Friday, March 25, 2016

Grandma's Kitchen (Houndstooth Quilt Pattern) Part 2

I wanted to share the story of where the name for my Houndstooth quilt pattern came from. This was the first quilt I made from this pattern:


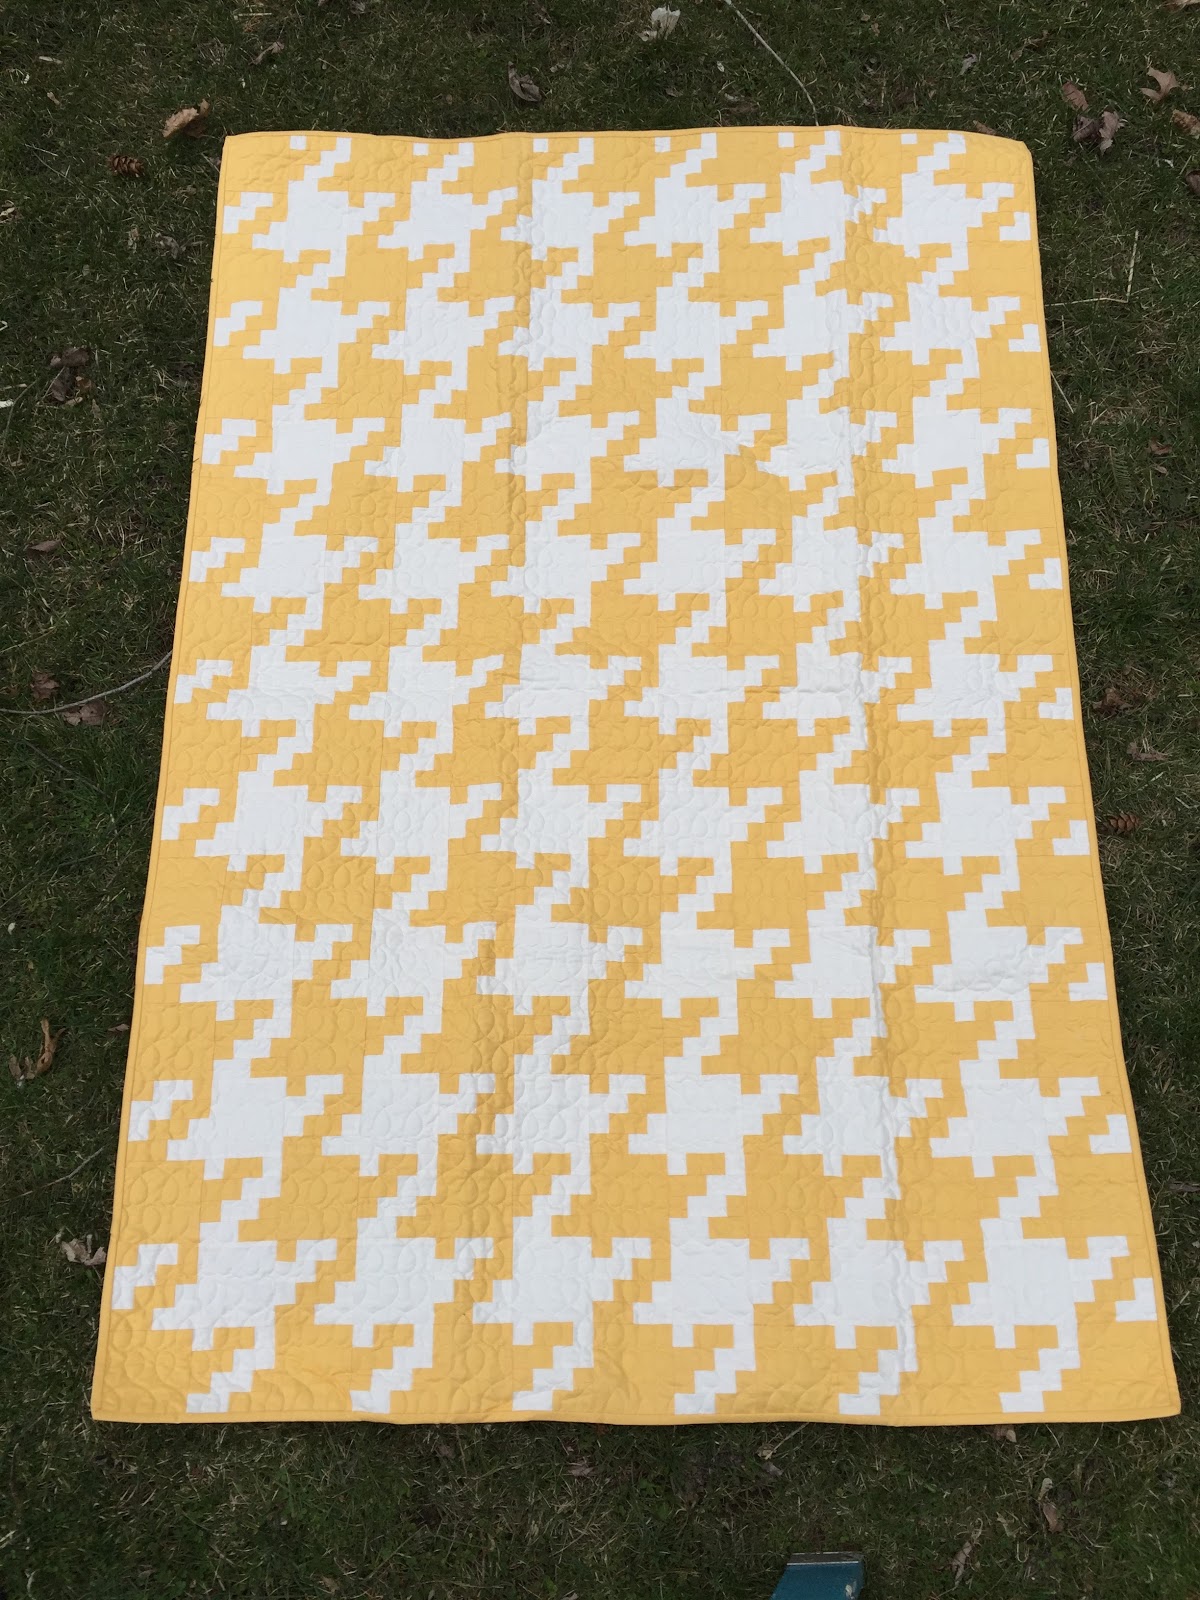
When I first thought about this design, I always pictured it in Yellow and White. I wasn't sure why but that was how I pictured it. A few months after I started this quilt, I was flipping through some old pictures and came across this gem:


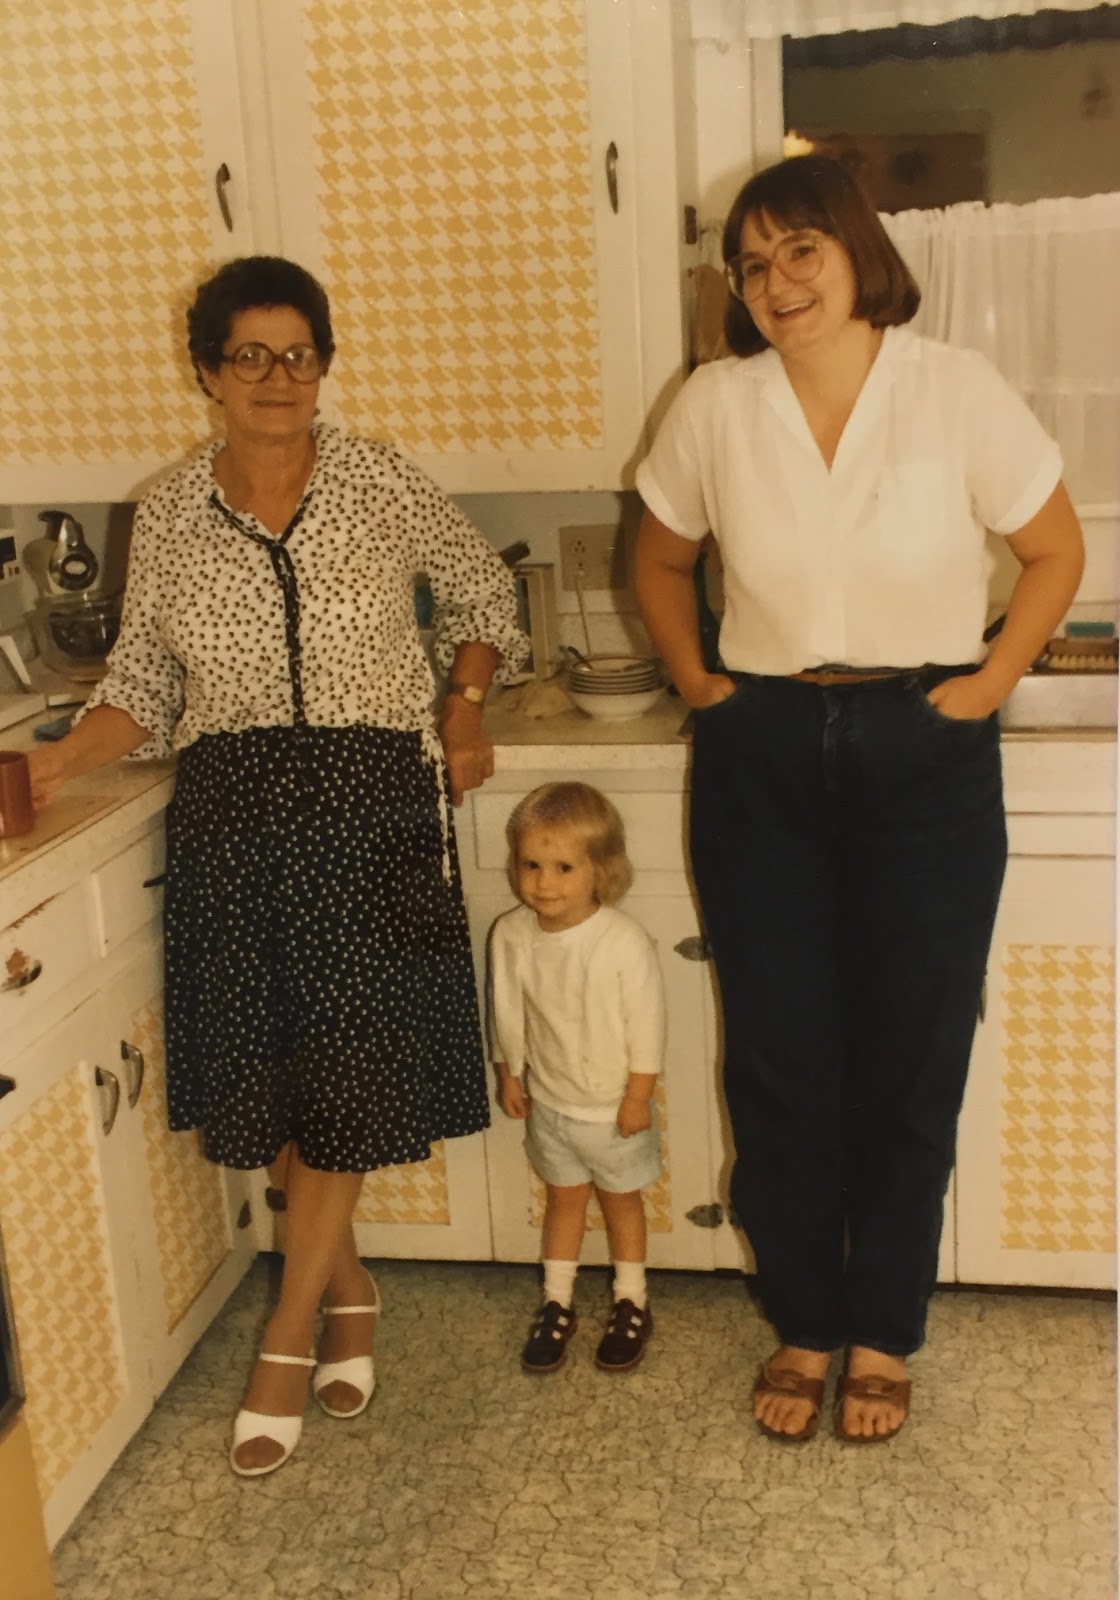
This is (roughly) circa 1985 and it's a picture of me with my Grandma and Mom in, of all places, my Grandma's Kitchen! And will someone check out those kitchen cabinets??!! What a bright and cheery room and I LOVE that yellow and white houndstooth wallpaper on the cabinet doors!


Somewhere in the back of my mind I had this comforting image of my Grandma's Kitchen and this pattern from the cabinets was part of it. It was just such a funny and sweet memory when I came across this pic and it all flooded back. 

Here's one more pic of this version of the quilt, showing the fabric that I chose for the backing as well:

I hope this encourages you to try this great pattern and make this wonderful, cheery quilt!


Sunday, March 20, 2016

Grandma's Kitchen (aka Houndstooth)


I am a huge fan of  Houndstooth fabrics/prints and had seen designs of Houndstooth quilt patterns online recently. However, the patterns I had seen didn't really look like Houndstooth to me so I decided to design my own pattern. I have made quite a few of these myself now and love this pattern so I want to share it and make it available to anyone. All I would ask is that you please link back to this blog for any pictures or descriptions of any sort that you post online of your projects or process where you've used any part of this pattern, design or idea. Please help me to keep designing and sharing!
Now I will jump right in to the pattern and tutorial. Please comment with any questions and I will get back to you as soon as possible.

For the top of this quilt, you will need two different fabrics:

Fabric Requirements (Throw size 52" x 76"):
Light 2 1/2 yards
Dark 2 3/4 yards
Binding 5/8 yard
Backing 2 1/2 yards

Cutting:
1. From the Dark fabric cut 9- 4 1/2" x WOF strips, 15- 2 1/2" x WOF strips and 10- 1 1/2" x WOF strips.
2. Sub-cut the Dark 4 1/2" strips into 70- 4 1/2" squares

3. From the Light fabric cut 7- 4 1/2" x WOF strips, 15- 2 1/2" x WOF strips and 10- 1 1/2" x WOF strips
4. Sub-cut the Light 4 1/2" strips into 54- 4 1/2" squares

Steps:
5. Following the pictures below and using the strips you've cut, make strip sets.
6. Sew a 2 1/2" Dark strip to a 2 1/2" Light strip to make 10 Unit A strip sets.
7. Sew 1 1/2" Dark strips to both sides of a 2 1/2" Light strip to make 5 Unit B strip sets.
8. Sew 1 1/2" Light strips to both sides of a 2 1/2" Dark strip to make 5 Unit C strip sets.


Strip Set Unit C 

Strip Set Unit A
Strip Set Unit B


Follow the general rules of pressing to the darker fabric and your quilt will go together much easier!

By pressing to the darker fabric for the Unit B & C strip sets, you can layer them right sides together and they will "nestle" nicely for the next step of sub-cutting.

9. Cut all strips sets into 1 1/2" sub-cuts. You will need 246 of Unit A, 123 each from Units B & C.

Block #1

Block #2


10. Piece the blocks according to the pictures above. You will need 60 of Block #1 and 63 of Block #2. 
11. Lay out pieced blocks with 4 1/2" cut squares according to the picture making sure that each block is turned the right way. 


12. Sew together. Quilt. Bind. Enjoy!