Showing posts with label Denim - Upcycled. Show all posts

Thursday, March 28, 2013

Denim Up-cycled! part 2


Hopefully you have seen all of the prep behind this quilt already from yesterday's post and are here to see the construction. As a typically traditional quilter, this quilt takes me a little outside of my comfort zone but I absolutely love the end-result, so I am excited to share it with you! When we left off yesterday, I had my denim circles and 5.5" quilt fabric squares all cut out and ready to go. Next, I set up a sewing station where I had an iron just to my left so I could sew and iron without having to move each time.

If you are a fairly comfortable sewer/quilter, you should be able to do this quilt exactly as I did. I took a square of my quilting fabric and laid it in the center of the wrong-side of a denim circle and pressed them together with a hot iron.  By doing this, the fabric square stayed in place pretty well (you only need it to be held in place temporarily this way until you stitch it in place later on). You could also use a lightweight fusible if you felt more comfortable that way but I didn't find that to be necessary.


Then, I layered those pieces right-sides together with another denim circle. 


After that, I stitched through both denim layers just to the right of the floral square along one side.


                                 Resulting in a piece like this:


Press the seam open.


Tuck another square in against the seam.


And press to hold that piece of fabric temporarily in place until the next step when it is sewn into place.


I always call this stitch setting (#33 on my sewing machine) the "blanket stitch". It has a similar look to the hand-sewing stitch by that same name (in my opinion).
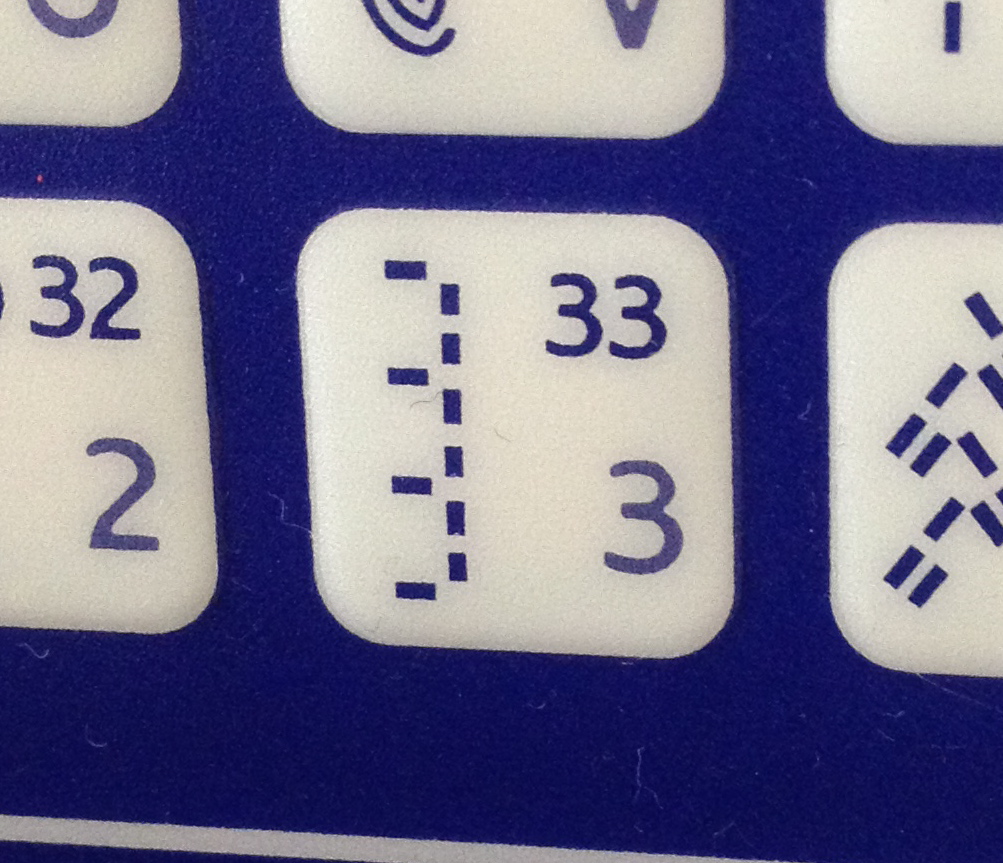

Using this stitch (or something similar on your sewing machine) stitch along the raw edge of the seam you just pressed open. When you get to the bottom of the first side, you can lift your presser foot and pivot your piece to do the other side so you don't have to clip your threads.


This is a close-up view of the stitch:


By constructing the quilt in this way, you are quilting as you go. 

Repeat these steps to make a second set:


And then sew through both layers of denim along one side to make a 4-patch. 


Continue constructing the quilt in this way until you have as many 4-patch units as needed to make the quilt the size you want.


Working the blocks in this way makes it easier to handle. As soon as you start putting the 4-patch units together, it will get harder and harder to work with because of the bulk and weight of the quilt. Keep going! The end result is worth the effort. 


I think this would be a great indoor quilt - the weight of it is wonderful. But, this would make the perfect picnic quilt because the denim is such a sturdy fabric. In a way, you actually get 2 quilts in one since the back is lovely too! I hope you enjoy this pattern/instructions. Thanks once again for visiting our blog!


Denim Up-cycled! part 1


So, as with most quilt projects, this one has a story:

I have been collecting denim for the last 12 years. I had a project in mind and realized that purchasing new denim off-the-bolt can be pricey so I collected old work jeans from my husband, father-in-law, grandfather and anyone else who had a pair they were getting rid of. Most of these jeans had holes and stains and were no longer good for wear, but as it turns out, could be good for making a quilt!

I collected the jeans in a large black garbage bag and over time the collection grew. We have also moved a few times over the years and each time as my husband would almost break his back carrying this rather large bag, he would complain and tell me he was going to throw it away if I didn't use it for something. In his defense, the bag probably weighed well over a hundred pounds before I started this project. :-)

So the search began for the perfect project to make out of my denim. I found pictures of faux-cathedral-window denim quilts on-line but I wasn't able to easily find instructions. I love the outcome of my quilt so much that I took pictures of the steps and am providing instructions here for any other denim collectors out there. And, if you don't have a collection of denim and would like to make a quilt like this, your local Goodwill store or thrift shop would be a great place to start.

Start by washing all the jeans - if they have stains on them, you want to make sure any chemicals, etc are washed off so they won't destroy your quilt as time goes on. Then, I cut apart the denim by taking off the thick seams at the hems and sides. The best useable pieces were in the legs, particularly if you can find relaxed fit jeans.

Next, I went to my kitchen with a square quilting ruler in hand and measured my mixing bowls. I found that I could get 3-4 circles of this size out of the front and back of each leg of each pair of jeans for approx. 12-15 circles out of each pair of jeans. Some of this depended on the wear on the jeans I was using and where the holes were. As far as stains were concerned, with the way this quilt goes together, you have a wrong side of the fabric that is completely covered so you can hide a stain.

If you have a stash of denim and a stash of other cotton quilting fabrics on hand, you can make this quilt at almost no additional cost. There is no batting in this method of construction. The only thing that surprised me was how much thread I went through so make sure you have a couple large spools depending on how large you want to make your quilt.

Confession: I had a few fabrics that I loved too much to cut up so I
never used them! I love denim too, so I decided this project was
worthy of these fabrics. But, before I could cut into my favorite, I
had to take a pic. No other quilters have this problem, right?


Once I had my mixing bowl picked out, that determined the size the finished blocks would be as well as the cut size for the quilting fabrics. I cut my quilting fabrics into 5.5" squares. With the denim, I laid my mixing bowl upside down onto the wrong-side of the pant legs and traced around it with a Sharpie marker. Then I used a pair of scissors and cut out my denim circles. When I started out, I didn't know how large I wanted to make my quilt so I initially cut 75 denim circles and then went back and cut out more once I got started.


Be sure to check out tomorrow's post where I will give the step-by-step construction for this fun up-cycled quilt!